 Sketching Knots
 Sketching Knots
To start sketching something, click on the 'Draw' button near the top of the main control panel. This will bring up the sketching control panel, which is explained on this page.
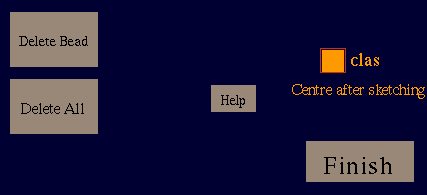 When you first enter sketching mode, any knot or link that
was loaded in KnotPlot still remains, thus allowing you to
add to it.
If you would prefer to start a new knot, then click
on 'Delete All' near the top of the panel.
'Delete Bead' will delete the last bead drawn.
'Finish' will return you to the main control panel. and 'Help' will bring up this HTML page.
Normally, what you've drawn is automatically centered after
sketching is finished.
If you don't want this to happen make sure
the 'clas' box is not selected.
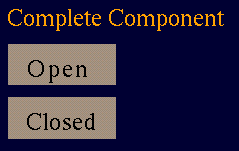 You don't need to use these two buttons unless you
plan to draw links.
Link components can either be open or closed.
When you have finished drawing one component,
click on one of these two buttons to indicate
which type you want.
After that you can click on 'Finish' if you don't
want to sketch any more components or you can
keep sketching.
Please note that at the moment open components
are not fully supported by all KnotPlot commands.
If something unexpected happens, use the
open and
close commands.
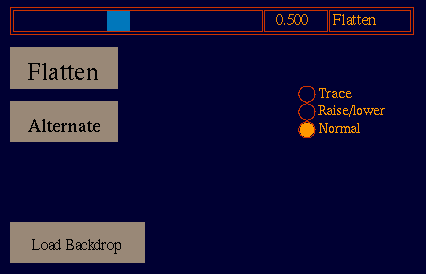 Clicking on the 'Flatten' button is exactly the same thing as
using the
scale command with the first two
arguments equal to 1 and the last argument (the z-scaling) set to
the value of the 'Flatten' parameter.
Set the slider to 0 and click on 'Flatten' to project the knot
to the xy-plane.
KnotPlot usually does sketching in the 'Normal' mode, where beads are automatically placed so the cylinders they are connected to do not intersect other cylinders. This sometimes fails, however, be sure to read the important information below to get the best results.
Selecting 'Raise/lower' sketching will cause KnotPlot to not autoplace the beads. Instead, beads will be positioned high or low depending on whether the middle or left mouse buttons are pressed.
'Trace' sketching mode is currently not implemented. Selecting this option may have unexpected results.
Sometimes it's nice to have a background image displayed while sketching. To get one, first prepare a suitable image file in the raw PGM format with the name kp-backdrop.pgm (soon you'll be able to use an arbitrary file). The image should be about the same size as the view window, or perhaps slightly smaller. Then click on 'Load Backdrop' to load your image in the background. The 'Load Backdrop' button will change into a 'Kill Backdrop' button which you can use to get rid of the background.
Backdrop images are not properly implemented in KnotPlot.
If you delete beads you may have to kill and then reload
your backdrop to see the sketching area properly updated.
 Important Information
